Niagara Batch Editor
Introduction
Some of the most valuable features in Niagara are nothing more than timesavers; Analytics or custom graphical widgets are very cool, and can often be a selling point, but sometimes, you need nothing more than a way to take a tedious, 16-hour task and complete it in just 10-15 minutes. The Batch Editor can do exactly this for many large-scale changes, and we’re going to go over how it works, and the various ways it can be used.
This guide will assume some basic knowledge of BQL. Fortunately, the last guide that I published was an introduction to BQL, so if you’re unfamiliar with it, go read this first!
Important Warning
The Batch Editor is incredibly powerful and can make huge, sweeping changes across a station. This is why we want to use it, but this also means we have to be incredibly careful while using it. There is no undo button! Make station backups regularly, and always be mindful of what changes are being made.
Basic Usage
The Batch Editor is used by navigating to station:|slot:Services/ProgramService. This service is installed on any station by default. First, make sure you have an understanding of your station and its data model/naming standards. Below is the basic structure of the example station we’ll be working with:
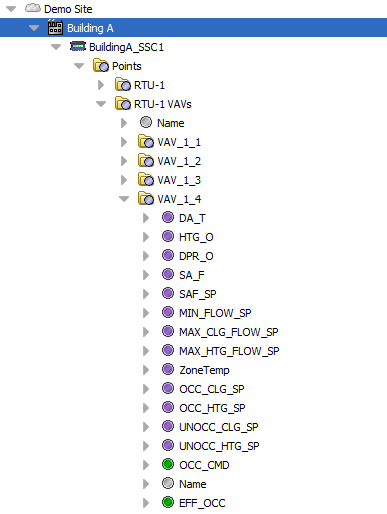
For our first example, let’s change all of our Occupied Cooling and Occupied Heating Setpoints! The UI is pretty easy; When there are no components listed, the only usable option is “Find Objects”. When we choose this option, we get the usual Niagara BQL GUI. First, let’s just grab all points with the name "OCC_CLG_SP”. Below is how our BQL UI should be filled out, as well as our resulting list:

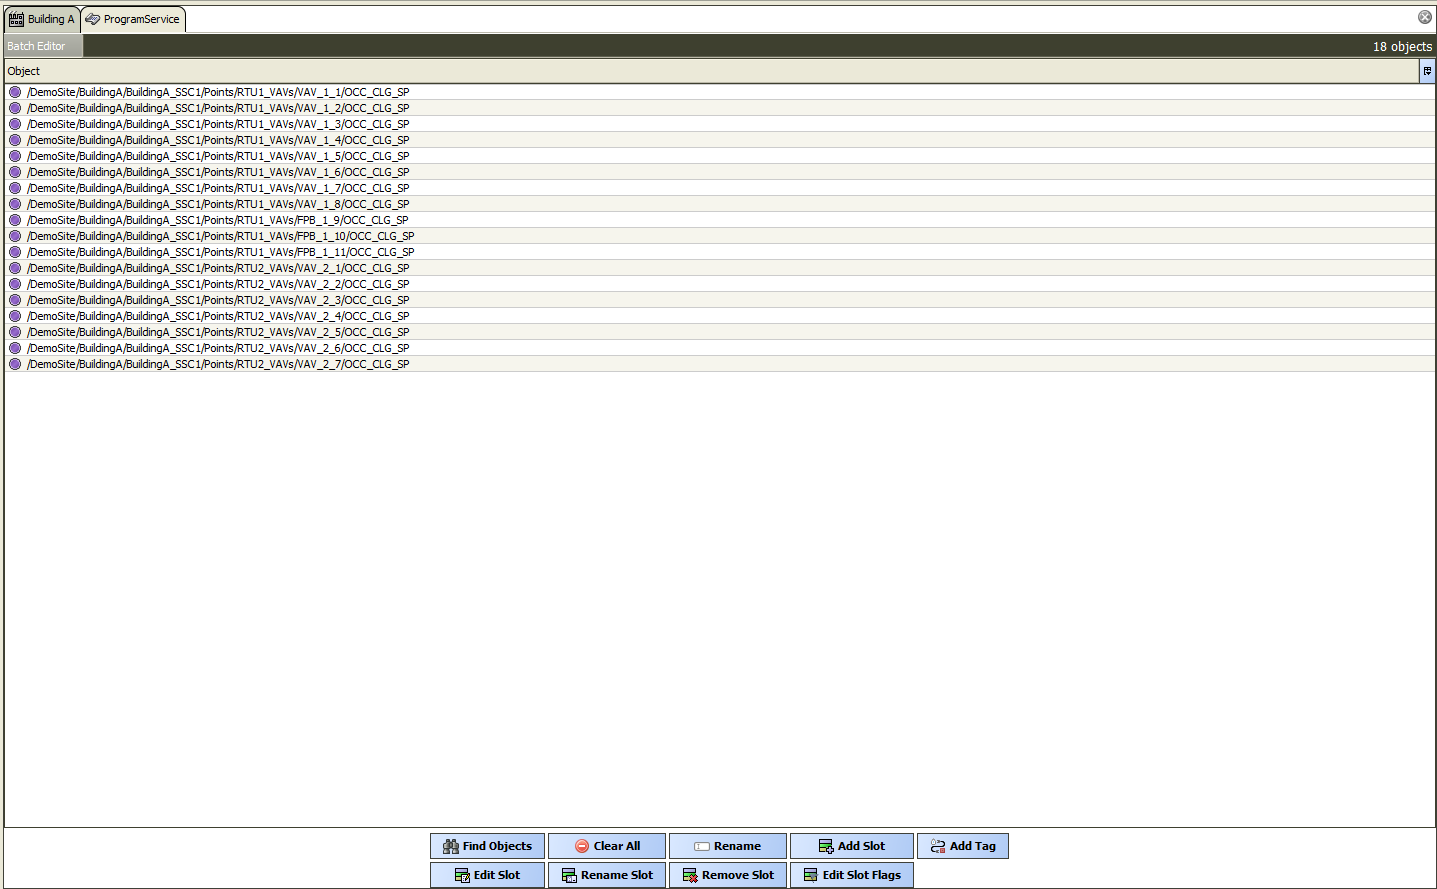
Now that we have some objects selected, all of our other UI options are available. This is when we can start making some station changes. First, though, it’s important to be able to prevent certain changes. Let’s say we want to keep VAV 1-8 (Training Room) at its current setpoint since it’s used differently than other spaces. After objects are added to our list, we can select an individual object, and our top toolbar will become lit up with options. The button circled in the below screenshot will remove the selected object:

Now we can just choose “Edit Slot”. This will give a popup with all the slots on all of our components. For what we’re doing, we want to select the “fallback” slot; This is the slot that’s changed when we use the “set” action on a point directly, so changing this value is functionally the same as doing a “set”. Below is the usual slot editor UI:
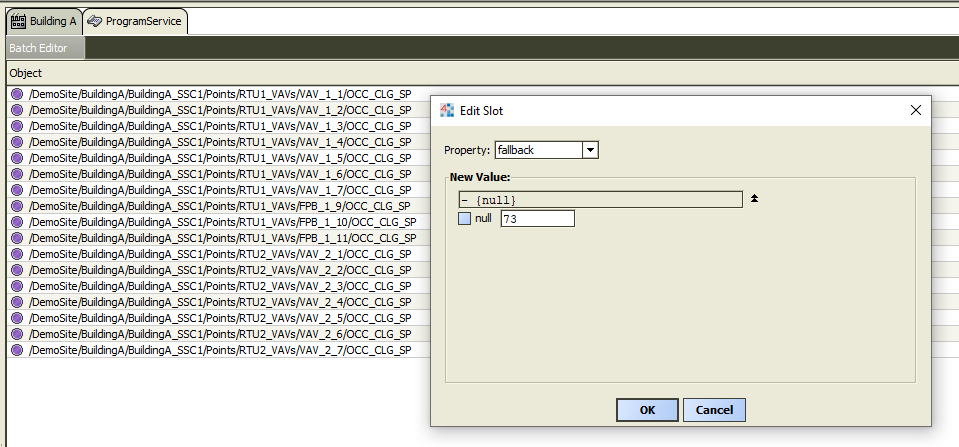
As soon as you hit OK on this popup, the batch editor will go through and apply this change to everything in your object list. It will show the below popup to confirm where the changes were made:

This basic functionality of editing existing slots can already save a ton of work; You can use this to alter history extension settings, alarm extension settings, change statically configured pieces of any logic you’ve set up, and much more. However, this is just a small piece of what you can accomplish with the Batch Editor.
Name Standardization
To work on any large system efficiently, it’s important to have consistent point naming. This lets you apply tagging via tag rules, more easily sort through a station with BQL, and reuse px graphics, among other things. The Batch Editor is incredibly useful for accomplishing this! Using our same example station, let’s say our Zone Temp points were named incorrectly. Some are ZN-T, some are ZoneTemp, and some are RM_T, but our standard name is “ZN_T”. To start, we want to grab all of our numeric points in this building. Renaming is done via search and replace, so in this case, it’s safe to have some extra objects on our list! Below is an example of what you’d see after getting all these points in the list:
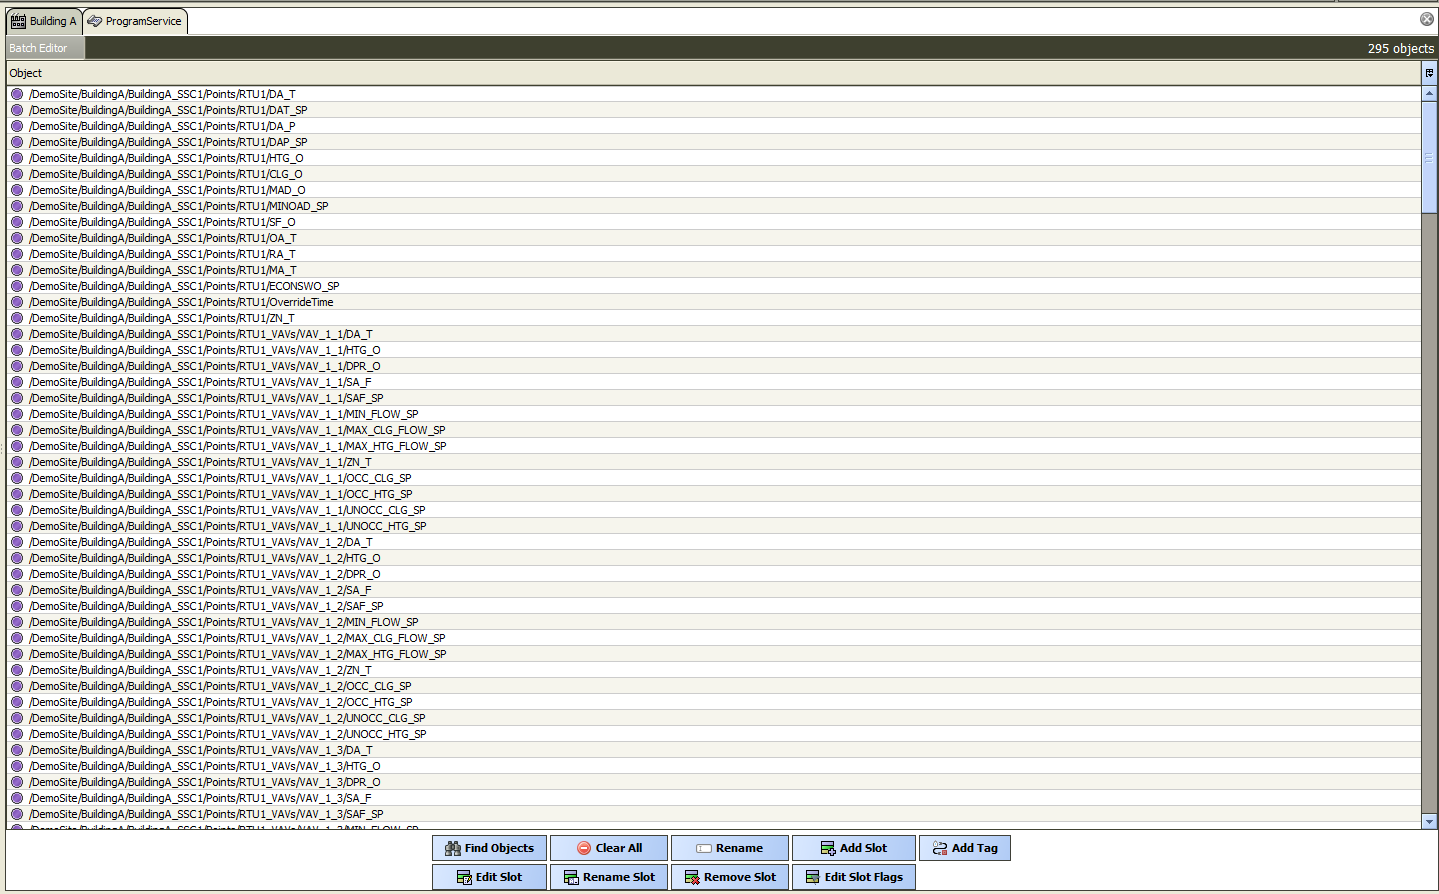
Now that we have all these points, we want to use “Rename”. “Rename Slot” can also work, but in that case, it is doing our renaming on slots under what was returned here, rather than our actual results. When you choose Rename, it will give you the following popup:
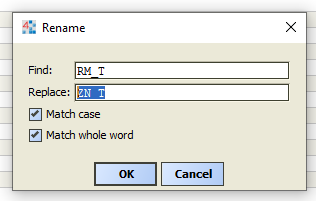
First, we want to check both boxes; This will ensure it’s not doing partial name replacements and that our search is case-sensitive. Both of these options make sure we’re as restrictive as possible on where we apply our changes. Then we can simply enter the old name in the “Find” option, and our new name in the “Replace” option. This will have to happen in multiple steps, but all settings will be the same, except for “Find”, which has to be run 3 times, with “ZoneTemp”, “RM_T”, and “ZN-T”. Each time, this will give us the same confirmation popup as in our fallback slot example, but show our point names rather than values.
Adding Histories
The final major piece of functionality I want to demonstrate is adding slots underneath targeted objects. The most common way I apply this is by setting up our history extensions. As usual, we need to grab our objects first. We’ll use our newly renamed ZN_T points for this; Build a query that is searching for only numeric points named ZN_T, then choose the “Add Slot” option in the batch editor. This will give the following interface:
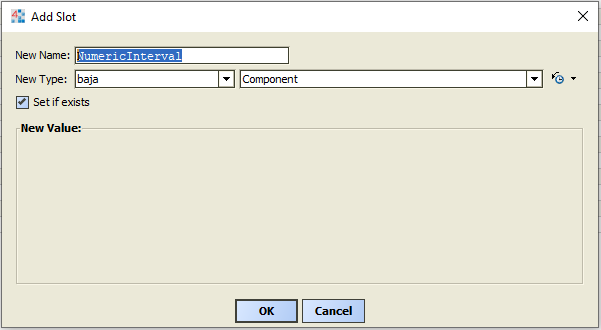
New Name is just the name of our newly added slot; This often doesn’t matter for history extensions, so I just set this to “NumericInterval”. We also need to select our slot type; Further options for our slot configuration won’t show up until this is done. In this case, we want the NumericIntervalHistoryExt slot from the History module, so on the first dropdown, we need to choose History, and on the second, we need to choose NumericIntervalHistoryExt. “Set if exists” will just modify how the Batch Editor behaves when the slot you’re trying to add is already there; If this is unchecked, the action won’t apply where a slot of your chosen name already exists. If this is checked, it will change all settings on the existing slot to match what you’re adding. From here, we just configure our history extension settings the same as when we add them manually; Below is a screenshot of the specific configuration that fits my standards and folder structure, but this will generally need to be tailored to your station:
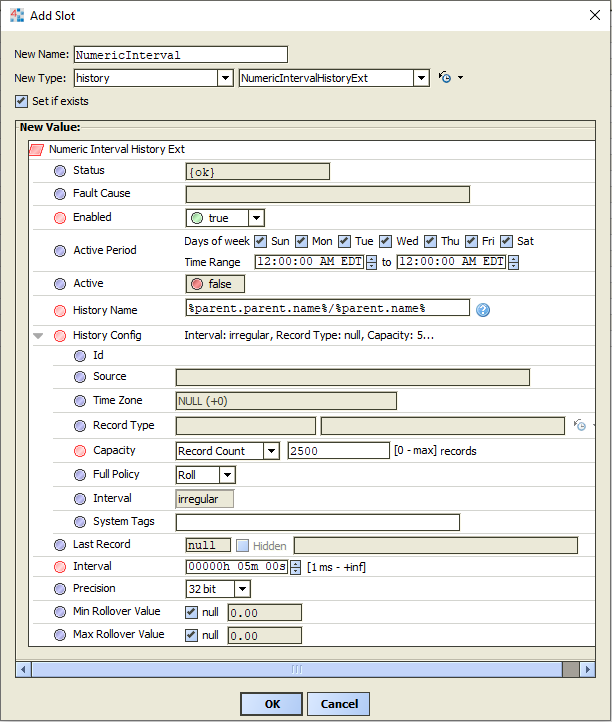
As always, when you hit “Okay”, Batch Editor will make your modifications, and show a popup confirming everything that was just done.
Exceptions
The examples shown here cover the absolute basics, but the Batch Editor is capable of far more than just these specific examples! Unfortunately, some common tasks can’t quite be done en masse this way, common examples being adding alarm extensions, or bulk copy/paste of other, pre-built groups of logical components. However, the Batch Editor can cover the vast majority of tasks that need doing within most integrations and can save enormous amounts of time when used correctly.
Additional Resources
Official documentation on the Batch Editor is a bit sparse. However, there are a few helpful documents listed in the Niagara help files. As usual, hit ctrl+L and paste this ord to get to this specific help page!
Several good examples: module://docEngNotes/doc/UsingTheBatchEdito..
Adding direct tags: module://docTagging/doc/AddTagsUsingBatchEd..